Turn your old PC or laptop into a server and own your own piece of the internet

Websites run on servers, but when people picture the hardware that hosts the internet they tend to think of huge server farms – industrial facilities with endless racks of swappable drives, and power consumption which would shame a small country.
In most cases this is true, and most websites are hosted on server farms, but they don’t need to be. A server is just a computer, and almost any computer will do. It doesn’t need to be recent, it can be 32bit or 64 bit; your server can have an ARM type processor or be X86 based. Your server can be the laptop you’re currently using, or it can be the desktop that’s currently gathering dust under the stairs.
Why would you run a website on a home PC?
A hosting plan from a commercial provider will cost anywhere from $5 to $100 per month. Aside from the cost of the hardware, which you may have lying around anyway, hosting from home is free.
You also have the server under your physical control – you don’t have to rely on third parties to secure it for you, and you don’t have to worry about the safety of your data being compromised by someone else’s mistake.
What do you need to turn your old PC into a server to host your own websites for free?
There are a few prerequisites you will need before you start.
- A broadband internet connection
- A USB stick of at least 4GB
- A Domain name
How can you transform your old Windows machine into a Linux server
For the purposes of this tutorial, we will be working directly on the machine that is to be transformed. You won’t need to remotely access it, but you may choose to later on.
After making sure that your old desktop is free of files that you may want to keep, download a copy of Ubuntu 22.04 Desktop edition, and flash it to the USB stick using the Rufus tool. Other Linux distros will work just as well, but try and pick one which is Debian based so that these instructions will remain relevant.
Insert the USB stick into the server and reboot. You will need to enter the BIOS to ensure that you are able to boot from USB. Do this by pressing either F2, F8, F10, DEL, or F12 as soon as the machine is powered. The exact method varies between machines so you may need to experiment a little.
Once in the BIOS, look for boot settings and ensure that USB is at the top of the list. Save and exit
The Ubuntu installation will ask whether you want a minimal or full install – minimal is fine for our purposes.
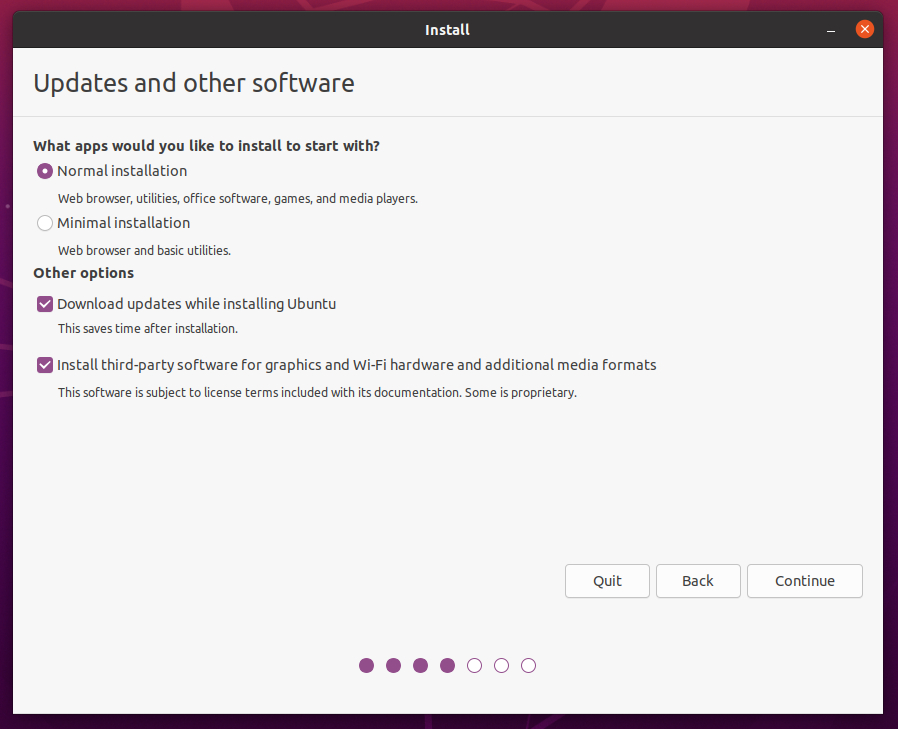
Continue through the wizard, going with whatever defaults the wizard suggests, but ensuring you set the correct locale, and choose a strong username and password.
When the installation is finished you will have successfully installed Ubuntu 22.04 on your old box.
Acquire a Domain name and set DNS records
Visit your domain name registrar and add a new record of the type A. Set the host as @ and the value as your home IP address. This will ensure that any requests to your domain name are forwarded to your router.
Set port forwarding on your router
Your router admin page is usually accessible by typing 192.168.1.1 into the address bar. If not, check the side of the router which will give you the correct address along with the default admin password.
Log into your router and look for a section called port forwarding or port management. Create a new entry for ports 80 and 443 – setting the value to the local IP address of your server. Installing server software on Ubuntu 22.04
There are a few additional pieces of software you will need, and you will install them via the command line.
Open up a terminal by pressing Ctrl + alt + T or by searching for Terminal in the menu, then enter:
sudo apt install apache2sudo apt install php Start Apache2 with
sudo service apache2 startVisiting your domain name should now result in you seeing the default Apache start page.
This page is located in /var/www/html
Edit it to create your own content on your own website on your own server in your own house!
sudo nano /var/www/html/index.htmlTurning an old desktop or laptop into Your own web server is just the first step
This guide has showed you the very basics of turning your old PC into a web server, but few people host static pages.
If you plan to pump out quality content using an easy-to-use and simple to set up Content Management System, you should consider either WordPress or Ghost.
Our guide to setting up WordPress on an old PC is a continuation of this tutorial series, and is meant to be read directly afterwards.